3.1. Preparation
After downloading and installing Qunomon, start developing an AIT based on the template.
3.1.1. User workflow
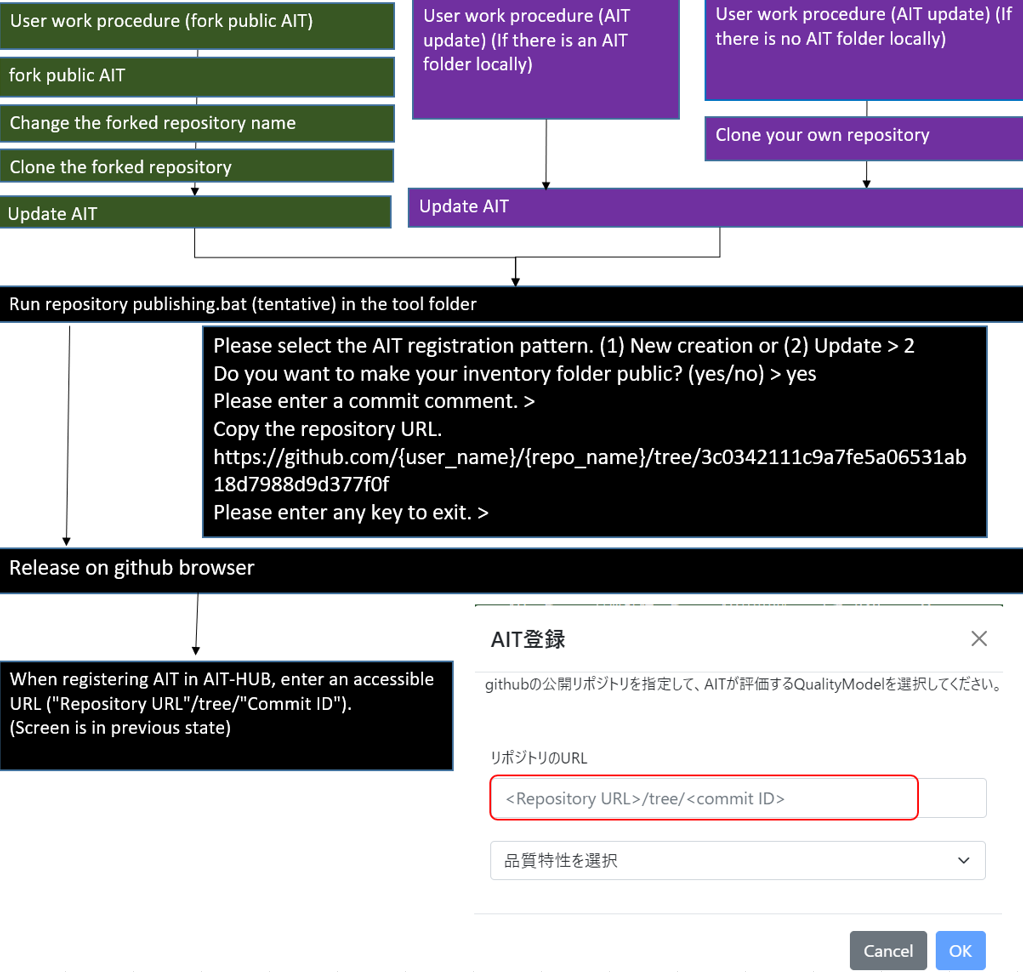
The development of AITs can be categorized into three scenarios: ① creating anew from an AIT template, ② updating an already developed AIT, and ③ having developed an AIT but not retaining the data locally. The workflow for each scenario is as illustrated below.
Note
If you do not intend to publish your created AIT globally, the steps beyond “releasing it on GitHub via a browser” are not necessary.
3.1.2. How to proceed in this tutorial
In this tutorial, you will need to execute commands as shown in the following example.
example:
ait-cli command
cd {sample}
ait-cli sample
Launcher
windows:
cd {sample}/tool
sample.bat
macOS, Linux:
cd {sample}/tool
sample.sh
ait-cli is a command line tool to support AIT development. Installation is not required, but recommended.
If you have installed ait-cli, please follow the “ait-cli command” command in future procedures. If you have not installed ait-cli, please follow the “Launcher”.
You can install ait-cli with pip.
pip install ait-cli
Detailed installation and usage instructions can be found at the link.https://pypi.org/project/ait-cli/
3.1.3. Set up AIT templates using ait-cli
Only those who have installed ait-cli should follow this procedure.
After performing this procedure, you do not need to perform the following procedures: Fork the AIT template, Change AIT repository name, and clone the AIT repository.
First, prepare the template for AIT development.
Go to the directory where you want to place the AIT template, and execute the following command.
ait-cli command
ait-cli create --ait_name {YourAITName}
AIT name (the part {YourAITName}), we recommend you to follow the naming convention as below.
3.1.3.1. Recommended naming convention of AIT
The recommended naming convention of AIT are as follows.
{prefix}_{target}_{format}_{task}_{measure}
| name | mandatory | description |
|---|---|---|
| prefix | Yes | This represents the type of AIT. - eval: Quality evaluation - alyz: Analysis - misc: Miscellaneous - generate: Used for AIT that generates data to be input to AIT. |
| target | Yes | Choose either "dataset" or "model" depending on the evaluation target of AIT. |
| task | No | The problem targeted by AIT. Example.image_classifier |
| format | No | The format of the data processed by AIT. Example. table |
| measure | No | The quality measured by AIT. Example. coverage_of_dataset |
restriction
The name must be 50 characters or less.
The available characters are half-width alphanumeric characters and underscore
_.
3.1.4. Fork the AIT template
AIT template is available on https://github.com/aistairc/ait-template.
Please fork this repository for your own AIT development.
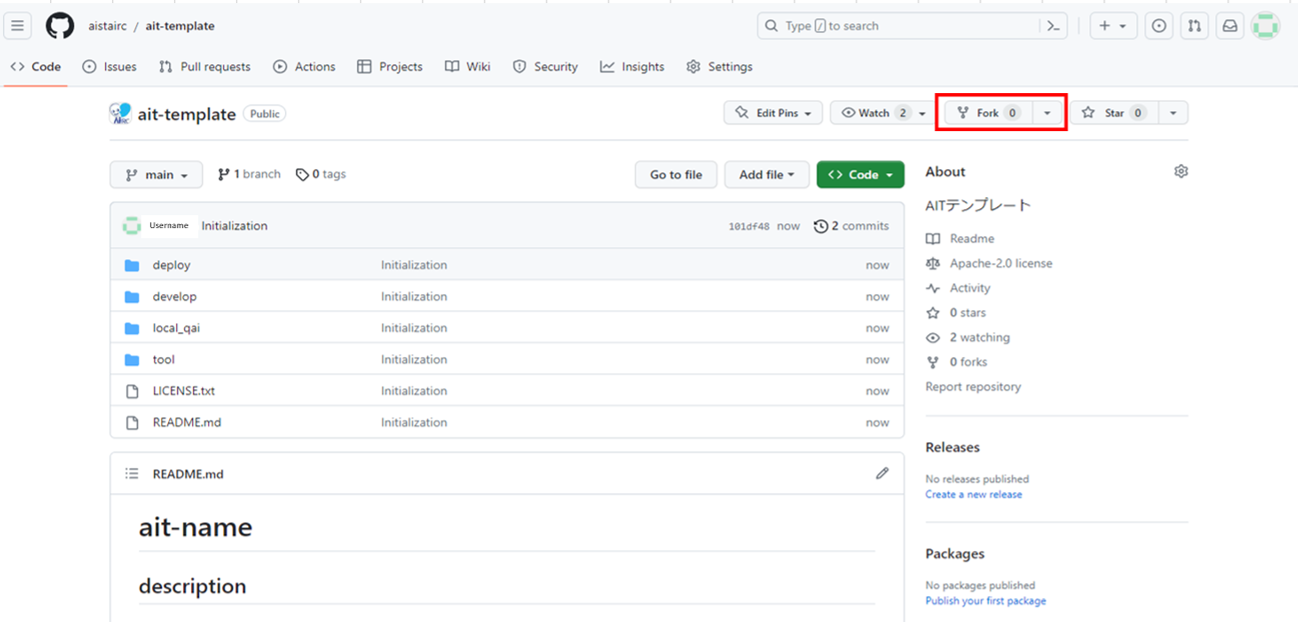
Important
The AIT template repository is set to public. After forking, please review and adjust the visibility settings as necessary.
3.1.5. Change AIT repository name
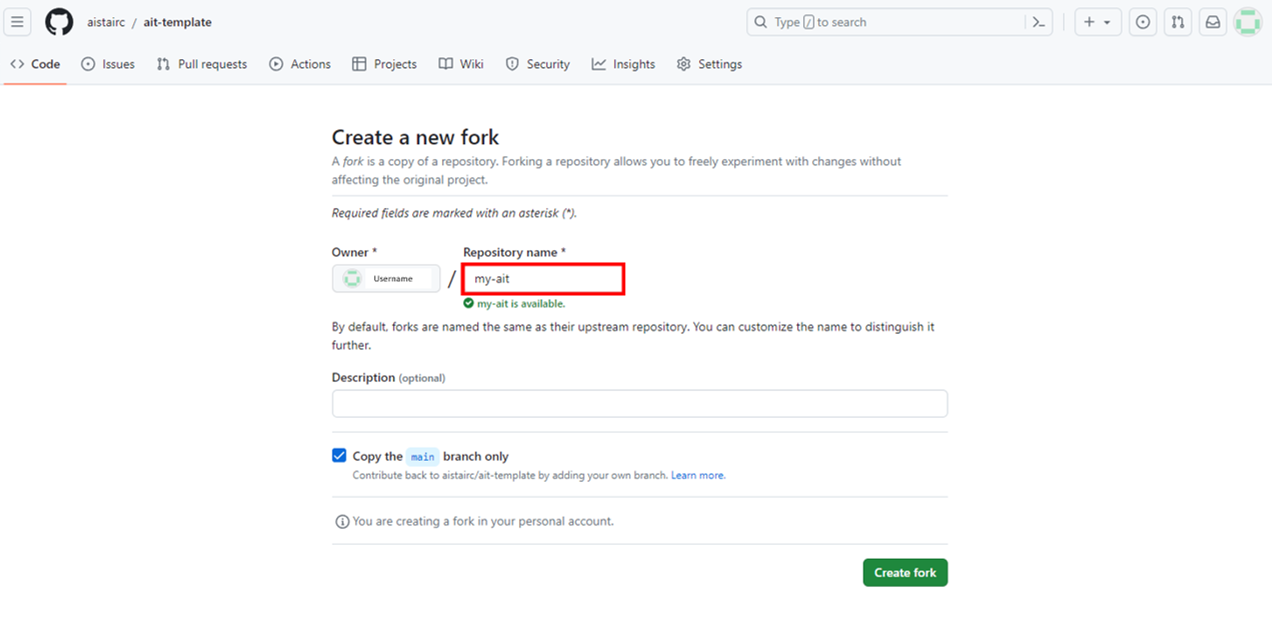 AIT name (the part
 {YourAITName}), we recommend you to follow the naming convention as below.
3.1.5.1. Recommended naming convention of AIT
The recommended naming convention of AIT are as follows.
{prefix}_{target}_{format}_{task}_{measure}
| name | mandatory | description |
|---|---|---|
| prefix | Yes | This represents the type of AIT. - eval: Quality evaluation - alyz: Analysis - misc: Miscellaneous - generate: Used for AIT that generates data to be input to AIT. |
| target | Yes | Choose either "dataset" or "model" depending on the evaluation target of AIT. |
| task | No | The problem targeted by AIT. Example.image_classifier |
| format | No | The format of the data processed by AIT. Example. table |
| measure | No | The quality measured by AIT. Example. coverage_of_dataset |
restriction
The name must be 50 characters or less.
The available characters are half-width alphanumeric characters and underscore
_.
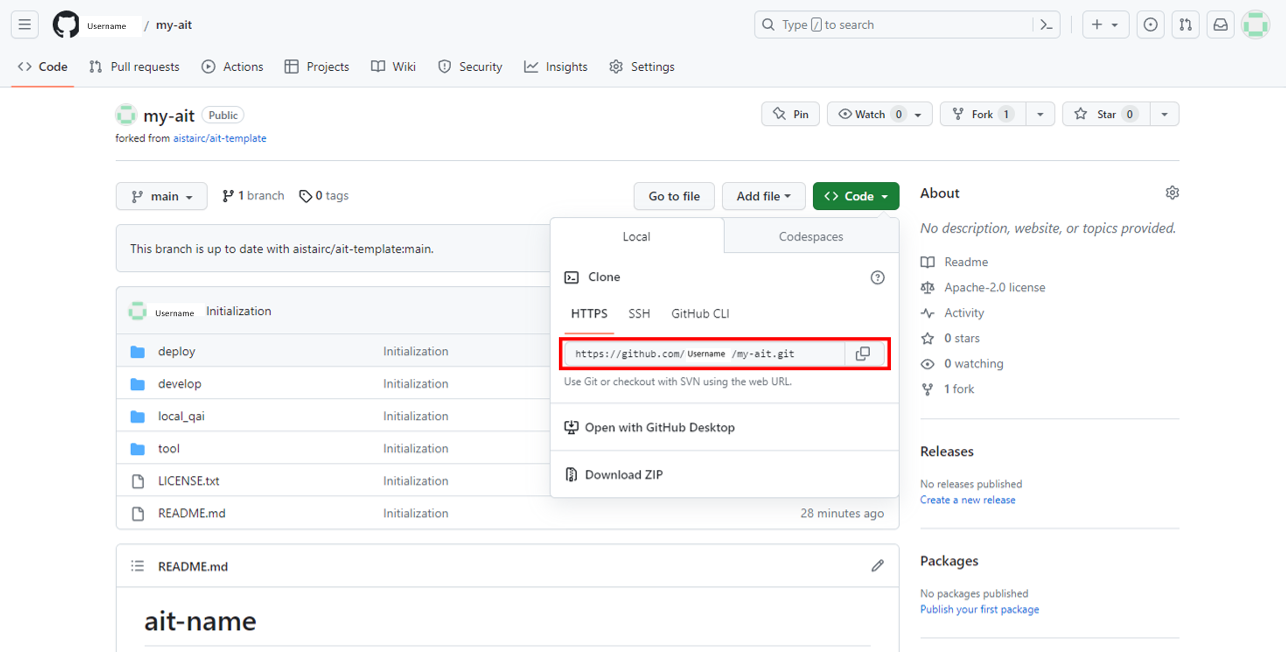
3.1.6. Clone the AIT repository
Fork the AIT template and clone it to your local machine.
3.1.7. Edit readme.md
After create a directory for new AIT, open {YourAITName}/readme.md and edit title.
Before
# ait-name
...
After
# {YourAITName}
3.1.8. Launch development envionment
We are providing Jupyter Lab environment adjusted to the AIT development purpose as AIT development environment. After launching them, they are provided as web application on the localhost. You can use them through your browser.
Remove docker image
If you want to switch between multiple AIT development environments, you need to delete the AIT development environment docker images created in the past. This is because the dependent software changes depending on AIT, and the AIT development environment also changes the software installation status. We apologize for the inconvenience, but if you want to switch between multiple AITs for development, please use the following command to delete the docker image in the AIT development environment.
Remove docker image command
docker rmi {ImageId of docker_jupyter}
Launcher
Windows:
cd {YourAITname}/tool
launch_devenv.bat
macOS, Linux:
cd {YourAITname}/tool
sudo bash launch_devenv.sh
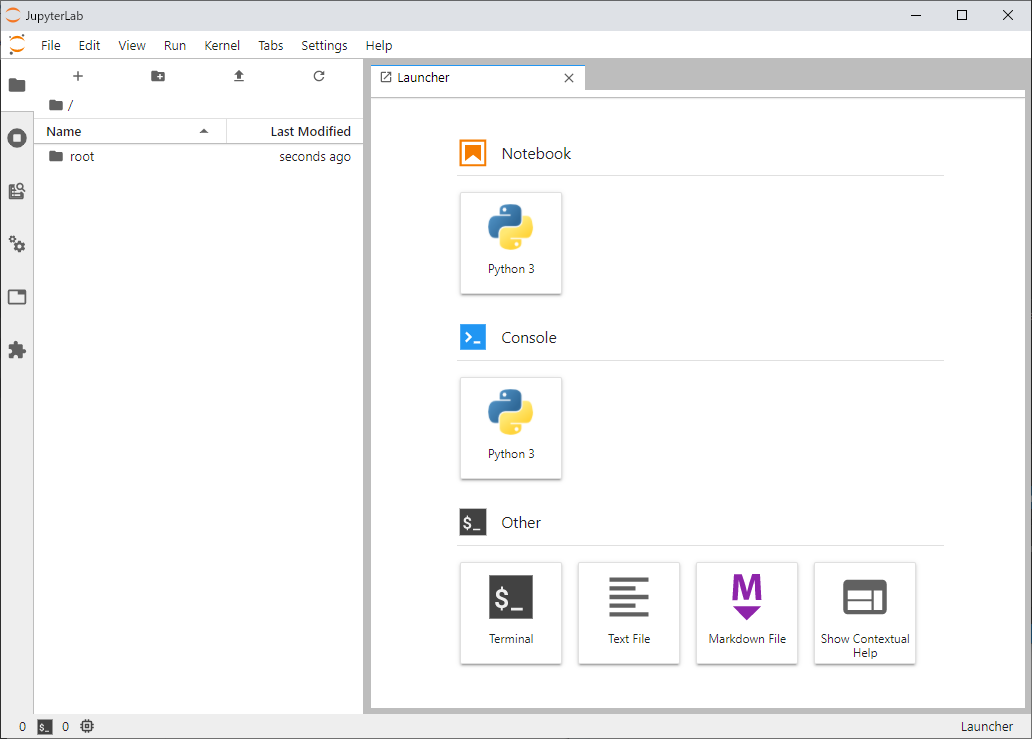
3.1.8.1. Screenshots after launch
If the launch has succeeded, applications below are displayed automatically.
Jupyter lab
3.1.8.2. Development work flow
In this tutorial, we assume following work flow as default development work flow.
Experiment and development of an AI evaluation program.
Porting AI evaluation program onto the AIT template (edit my_ait.ipynb).
Perform unit testing of an AI evaluation program.
Preparing registration for Qunomon.
Perform integration testing of an AIT with Qunomon testbed.
Publishing the AIT.
This tutorial follows this sequence and explains the detailed development methods for AITs from Section 3.2 onwards.